Your cart is currently empty!
How to Integrate DFRobot’s ESP32-S3 to Caspio
Posted by:
|
On:
|

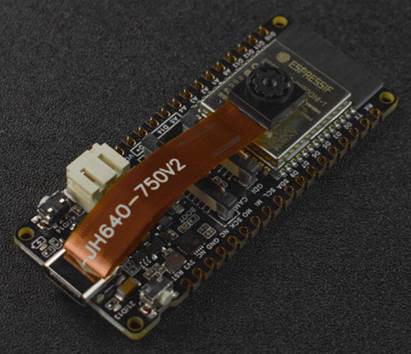
DF Robot ESP32-S3 Firebeetle II
I have a juicy topic for any 3D printing/mechatronics/tech junkies today. As I mentioned in my “About me,” I do consulting work for a small business called Agriburbia. They had a project and picked out the ESP32-S3 Firebeetle 2 from DF Robot.
Key Objectives
- Field image capture and data acquisition with Firebeetle II.
- Utilize Caspio’s REST API to transmit data to Caspio’s database.
- Decode image and integrate data within Caspio’s front end.
Project Outline
Reading the informative ESP32-S3 product page is a great place to start. It shows beginner examples and explains some of its operating features. Such as the boot and reset button operation.
From that, I started downloading and installing useful libraries along with the ESP32 library to the board manager.
This library comes with a ton of example sketches. The most epic one being in the camera folder, the camera web server sketch.
After opening this sketch, you need to input your Wi-Fi credentials, ensure you have the correct camera pins assigned, and voilà; you have a $19.90 live stream that you can connect to on any device on your internet. Super cool.
For my project, I used the camera, but only to snap a pic once a day or so, which turned out to be much harder than using this premade livestream.
I also needed to connect to temperature/humidity and soil moisture sensors.
One of the great things about Arduino, you get to work off the shoulders of giants that have gone before you, so these only took installing a couple libraries to function.
As for capturing an image with the Firebeetle II, that was a different story.
I worked off the livestream code, using all the variables, initialization, and even camera capture function.
This led me to the error I will never forget.
GURU MEDITATION ERROR
I spent weeks working off and on troubleshooting this error. I researched every resource possible, and they all came back to an overload in size of data transfer.
But with the 8MB of pseudo-static RAM, I knew there should not be a problem with the image size and quality I was attempting.
One straw before breaking the camel’s back (if I were a camel), ChatGPT finally gave me a new possible theory; the Firebeetle needed strict timing when initializing and capturing the camera.
Am I an idiot or is that intuitive?!?!
I thought the camera only needed initialized on first use and could then take multiple photos; that was not the case.
Once I grouped the camera operations together, OH MY GOSH IT WORKED.
Weeks of progress stalled but Gandolf said I may proceed now.
I think I had already implemented encoding the image file into Base64, so the image string was pasted in the serial monitor. I copied that string to a Base64 decoder and BOOM,
an image of my cute lil family, out of thin Base64 cipher, just how God wanted our eyeballs to work.

Just so you can visualize this, here’s how Base64 works and what an image string looks like.

Introduction to APIs
With that little blip out of the way, I was off to the races, this time running hurdles.
I have only ever programmed Arduino (C/C++) and MATLAB, but it was time for me to hand Jesus the wheel and jump into software development.
Luckily, I have a little brother (definitely physically and chronologically) in school for computer science.
I had no idea what an API was or what function it served, so he made me the most Carson style presentation I’ve ever seen. Of course, entailing SpongeBob references to bring it down to my level😂.
Here’s a simple image to convey the gist of it.


I also had a colleague that came from the software realm. After running many of my questions by him and receiving advice, I was ready to go.
His first piece. Get Weather Now.
This is a website that is often used to practice working with APIs to receive weather data. I uploaded a sketch to the Firebeetle that connected to my Wi-Fi and BAM, the serial monitor was printing Denver’s weather data. Here’s what that looks like in the serial monitor:


Feeling peak over-confident now, I thought I could just swap out the API credentials, key, and location and be on my merry way.
I must say, this is definitely the most useful ChatGPT has ever been to me. I asked it to write me the html code with all the headers, formatting and whatnot, and it did!
// Function to send PUT request to update temperature data
void sendTempPutWithSensor(float temperature) {
  HTTPClient http;
  http.begin(caspioTempPutUrl);
  http.addHeader("Content-Type", "application/json");
  http.addHeader("Authorization", "Bearer " + accessToken);

  // JSON data containing only the sensor value
  String jsonData = "{\"sensorField\": " + String(temperature) + "}";

  // Send PUT request
  int httpResponseCode = http.PUT(jsonData);

  if (httpResponseCode > 0) {
    String response = http.getString();
    Serial.println("PUT Sensor Response: " + response);
  } else {
    Serial.println("PUT Sensor Request failed, Error: " +              String(httpResponseCode));
  }

  http.end();
}
The biggest problem I ran into was what parts of the URL it needed.
I uploaded the sketch and went over to my free-trial Caspio account. I created tables in the database for the sensor data and Base64 encoded images. The table that had each of the streams of sensor data was actively updating with values of temperature, humidity, and soil moisture!!
It’s moments like these when I remember it’s all worth it.
I quickly added the html code for the image table and sent the encoded strings there.

Clear as butter.
I compiled all these section into the same program, added the Firebeetle’s deep sleep functionality, and it was off.
In testing, I had it taking an image and acquiring sensor data, sending it to Caspio, and entering deep sleep to turn back on and do it all over again a minute later. Oh, what a relief it is.
On Site Run-through
I brought the setup out to the farm for demo. I got their Wi-Fi, uploaded the program, and got an image pretty painlessly.
When trying to bring it out to its official location, we ran into a lack of Wi-Fi connectivity. Scooting closer and closer to the router, we finally got an image of a QR code they were going to use. Manually decoding that, we could see the image and the QR code worked!
It was telling how poor the quality was of the resolution I chose although.
It turns out the Firebeetle maxes out around 2MP, while the iPhone 15 has an astounding 48MP resolution.
The ESP32-S3 Firebeetle served its purpose for a proof of concept, but we were in major need of an upgrade.
Onto a Raspberry Pi and an Arducam 48MP or 60MP camera.
Thank you so much for following through until the end. If you have any questions, please comment below!
I will get the upgraded project complete and written ASAP! Tune-in in the meantime for whatever else I run into!